I though I would do a little write up on how to etch circuit boards cheap and easy using readily available laser transparencies so here we go.
Step 1
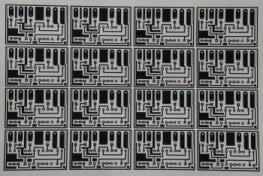
Check out how your boards are laid out by printing them on normal paper (Figure 1). To make the best use of the entire transparency sheet print as many boards as you can fit on one sheet. This way if you have a bad toner transfer later on you don’t have to waste another sheet of transparency printing a new one. It also makes it easier to etch multiple boards at one time.
Figure 1
Step 2
Here are the boards printed out on a transparency sheet. There are two sides to the print out. A side where the print is glossy (Figure 2) and the other side where the print is matte (Figure 3). The matte print is where the laser toner is exposed. Also note that you don’t have to reverse your layouts as the board is print on top of the sheet which we are going to flip later in step 4.
Figure 2
Figure 3
Step 3
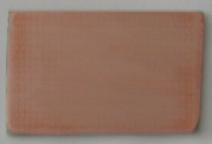
Cut out a piece of circuit board that fits your layout. Prepare the board by sanding it. This will clean the copper of dirt and oxidation on the surface. The cleaner and smoother the copper surface the better the toner transfer will be. (Figure 4) Avoid handling the copper with your fingers for now on as you will leave oil on the board hindering the toner from adhering to the copper properly.
Figure 4
Step 4
Cut out a board from the transparency sheet and place it on the board matte side down towards the copper. (Figure 5) The glossy side should be facing you
Figure 5
Step 5
Turn on your iron to the highest heat setting and set for dry ironing so there is no steam. Iron away on the sheet removing any bubbles to make sure that all of the sheet makes contact with the copper surface (Figure 6 compared to the glossy bumps in Figure 5). What you are trying to do is heat up the copper. The copper will get hotter then the transparency thereby attracting the toner from the sheet while the glossy side will insulate your iron from getting any toner on it.
Figure 6
Step 6
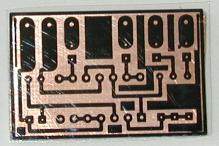
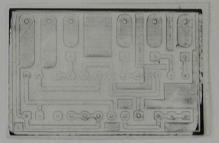
Keep ironing until transparency sheet looks to almost melted on the board. The board should also be fairly hot. Figure 7 shows a board before ironing. You can see imprints of sanding scratches on the left of the copper but not the glossy side of the transparency. Figure 8 is a transparency after its been ironed showing the imprints of sanding scratches on both the copper and transparency sheet. This lets us know the board and sheet have been ironed together very tightly which is what we want. Stop ironing at this point and let the board cool down.
Figure 7
Figure 8
Step 7
Once the board has cooled down you can remove the transparency sheet. Grab the least important corner (in terms of layout) of the sheet and pull away slowly from the copper. The toner should come off the transparency and remain on the copper. (Figure 9) If there is little or no toner coming off and you haven’t gotten to any important traces the you can re-iron the board otherwise you can wipe off the toner in the step 9 and continue from step 5 again.
Figure 9
Step 8
Chances are there are some spots where the toner did not transfer over because either dirt, oxidation, oil, bumps, etc. Toner that did not attach to the copper will still be on the transparency sheet so take a look at to see if anything important is missing. (Figure 10) If there are minor missing bits you can touch them up with a etch resistant marker. (Figure 11) Personally I just use a sharpie. Now the board is ready to be etched. I generally use ferric chloride. I haven’t used any other etchants with this technique so I do not know how well it will work.
Figure 10
Figure 11
Step 9
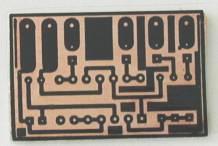
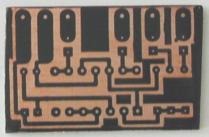
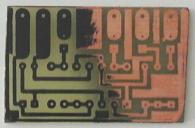
Here is the board after etching. (Figure 12) Any copper that the toner did not cover should be gone but the toner still remains. Remove remaining toner use a decent solvent. I like to use acetone. Figure 13 is the board with half of the toner removed.
Figure 12
Figure 13
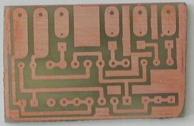
Step 10
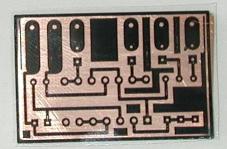
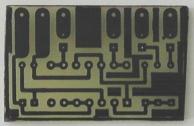
Step 10: A completed etched board with all the toner removed ready to be drilled and populated. (Figure 14)