Skip to content

SMDesy

SMD Board Construction

Intro

Surface Mount Device (SMD). Most DIYers retract in terror at the sight or suggestion of SMDs. The thought of using special tools and techniques seems to scare most. I decided to show how to make a circuit built with SMD parts using standard tools that most will already have on hand.

There some advantages to using SMD parts:

  1. Boards can be created without caustic chemicals making it easier, cheaper, safer, and better for the enviroment.
  2. Boards can be created that do not need drilling. Less work and need for special tools.
  3. SMD parts are usually cheaper and more availible as they are becoming more common and in some cases the standard.
  4. Many older parts used in effects are being discontinued in thru hole package but are still availible in SMD form.
  5. Many new parts that can be used in effects are coming in only SMD packages.
  6. Size. Obvious ?

Add Your Heading Text HereGoals

The circuit to be built will be the NPN Boost designed by Gus Smalley. This is also known as the “Beginners Project” at Aron’s DIYStompboxes.com forum which there is a board dedicate to just this project so if you need help with the circuit you can go there.

SMD parts will be used when possible. The circuit will be built using no specialized SMD equipment. Board construction will use no chemical etching or require drilling.

Board Creation Procedure

You need to create a layout for your board. This can be done a various number of ways. I choose to use PCB layout program. When laying out the board try to not think about the layout as a PCB where you leave only the copper you need. You should instead think about removing only the copper you do not need. This will mean less work for you when creating the board and will also keep your areas reasonably big to make it easier to solder the parts later. You should also try to group common connecting parts near each other.

Since the parts are going to be soldered by hand slightly larger versions then need parts are used. In this layout ceramic capacitors are size 1206 and resistors are size 1210.

Step 1

Print the layout on to normal paper

Step 2

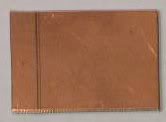
Cut out piece of circuit board the size of the layout
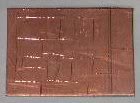
Step 3

Cut out the layout from the paper and attach it to the circuit board. I choose double sided tape but you can use clear tape over top or glue.
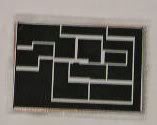
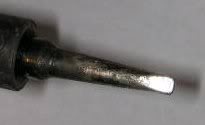
Step 4

Take a sharp edge like a knief and score along the area spaces shown in the paper layout. Warning: Secure the board some how so you don't have to hold the small board with your hand. Knief, fingers, slip, ouch.

Step 5

Remove the paper to reveal your score marks
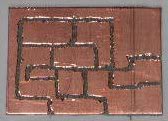
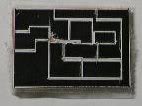
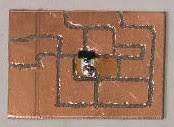
Step 6

Take a grinder of some sort (I used a high speed hand grinder like a Dremel) and remove the copper along the score marks. My board looks alittle rough because I choose a fairly aggressive bit due to my impatence. Warning: Wear protective gear. Googles for flying bits, gloves for any tool slippage, and a dust mask for the copper and fiberglass particles you are going to throw into the air.
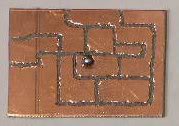
Run a continuity check with your DMM to makes sure all your areas are disconnected from each other. If everything checks out you are ready to solder.

A varition on this procedure is to do a toner transfer to the board like you would if you were doing a PCB only you don’t have to worry too much about quality as the transfer would only be used as a guide. Read the “Etching Boards” article to see how to use laser transperencies to do this.

SMD Solder Procedure

Just to show what I used to solder this project here is a picture of the soldering tip I used. A fairly standard large chissel tip.

Step 1

Tin one pad

Step 2

Place the componant and solder into place
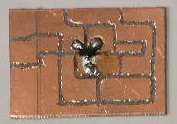
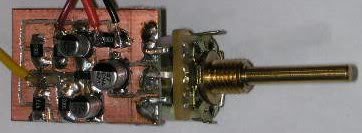
Step 3

Solder the other terminals

Continue soldering until you are completed with all the on board parts.

Off board wiring is done by soldering on to the pads themselves. Pots are soldered directly to the board. This is the completed ready to box circuit and yes it worked on the first try.

Hopefully this will reduce the fear of using SMD and encourage you to give them a try.

Your Tone God,

Andrew

Copyright The Tone God 2024